
How to Prepare Your Home Before a Remodeling Project Begins
 18 min read

Let’s Think. The crew arrives at 7:30 a.m. Your kitchen still has dishes in the sink. The hallway holds three boxes and a dog bed. Your laptop is on the counter you plan to demolish.
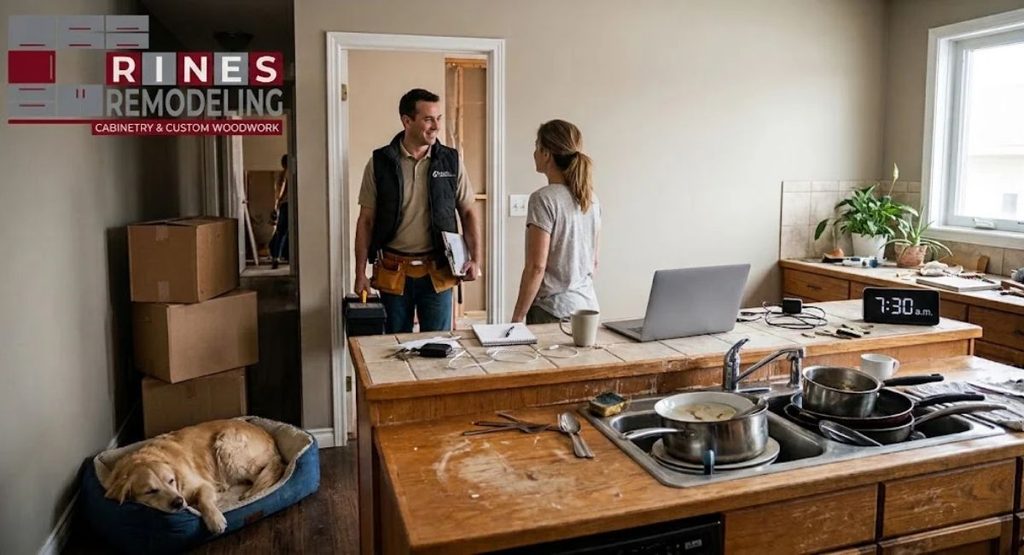
Nobody wants to start a project this way. The first hour goes to moving things instead of building. Dust spreads further than it should. A family heirloom ends up in the wrong place.
Good preparation prevents all of this. It saves time, protects your belongings, and keeps your household calm. It also helps the crew work faster, which can help your schedule.
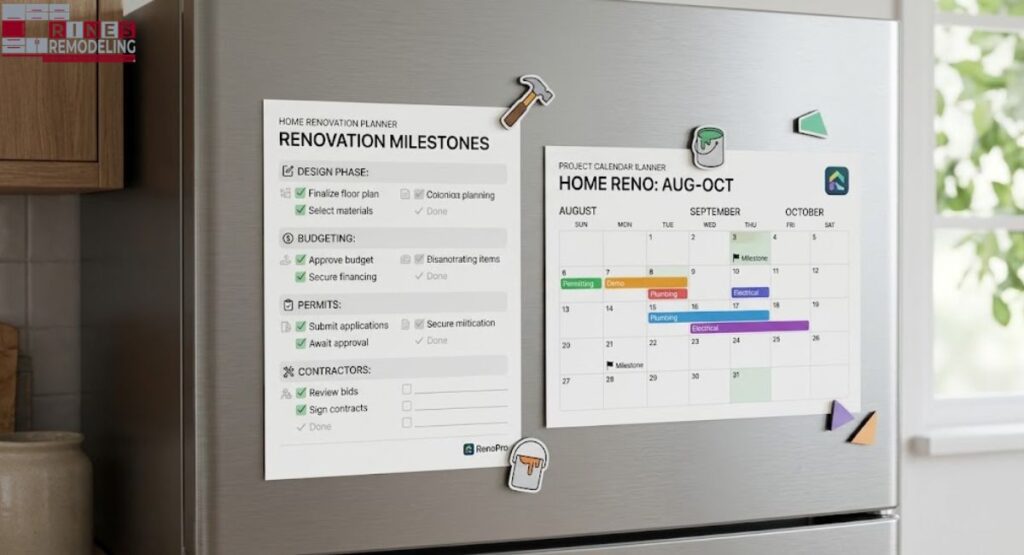
This guide shows you how to prepare your home for remodeling, step by step. You will get a practical, room-by-room checklist. You will also see how to handle dust, pets, children, valuables, and daily routines. Use it as a working plan, and print the checklist near the end to keep on your fridge.
Why Home Preparation Matters More Than Most People Expect
A remodel changes your home for weeks or months. Even a small bathroom update brings tools, noise, strangers, and debris. A full kitchen or basement project brings much more.
Preparation matters for four reasons.
- Safety. Clear paths keep you and the crew from tripping over items.
- Protection. Floors, furniture, and valuables are easier to protect when they are not in the work area.
- Speed. Crews lose time when they must move your things first.
- Comfort. A plan for meals, laundry, and sleep reduces stress.
Many homeowners also underestimate dust. Drywall dust, sawdust, and sanding dust are fine and light. They travel through open doorways and heating and cooling systems. Without barriers, dust can reach rooms far from the work.
Preparation does not need to be perfect. It needs to be deliberate. A few hours of planning before day one can save days of cleanup later.
Talk With Your Contractor Before Anything Moves
Preparation starts with a conversation, not a cardboard box. Your contractor knows what the job needs. Ask before you move anything.
Confirm the Schedule and Start Day
Ask for the start date, the daily work hours, and the expected order of work. A typical project moves from protection and demolition to rough-in work, then to finishes. Knowing the order helps you plan each stage.
Ask which days will be loudest. Demolition is often the noisiest phase. If you work from home, you may want to plan calls elsewhere on those days.
Agree on Work Zones
A work zone is the area where the crew will build. It includes the room itself and the path used to carry materials in and debris out.
Ask your contractor to walk the home with you. Point out:
- The room being remodeled
- The door the crew will use
- The path to the room
- Where tools and materials will be stored
- Where the dumpster or debris container will go
Clear answers here make every later step easier.
Decide How You Will Communicate
Choose one main contact and one method, such as text or email. Agree on a daily check-in time. Ask what decisions may come up during the work, such as hidden damage behind a wall. Quick answers keep the job moving.
Review Permits and Neighborhood Rules
Larger projects of home remodeling in Indiana often need local permits. Your contractor usually handles this process, but you should know the status. If you live in a neighborhood with a homeowners association, check for rules on work hours, dumpsters, and parking. Cities and towns around Indianapolis, such as Carmel, Fishers, and home remodeling in Noblesville, may each have their own requirements. Ask your contractor what applies to your address.
Check Your Home’s Age and Hidden Risks
Older homes need extra care. Many homes across Indianapolis and Marion County were built decades ago. Some include materials that were common then but are handled carefully today.
Lead-Based Paint
Homes built before 1978 may contain lead-based paint. Sanding or cutting painted surfaces can release lead dust. The U.S. Environmental Protection Agency requires firms that disturb lead paint in older homes to be certified and to follow lead-safe work practices. You can review the rules on the EPA’s Renovation, Repair and Painting Program page.
Ask your contractor if they follow lead-safe practices. This matters most if children or pregnant family members live in the home.
Asbestos in Older Materials
Some older flooring, pipe wrap, and insulation may contain asbestos. Testing is the only way to know. If your home is older and the project will disturb these materials, ask your contractor about testing before work starts. Do not scrape, sand, or break suspect materials yourself.
Why This Matters for Preparation
If hazards are present, the plan changes. The work zone may need stronger sealing. The crew may need special cleanup steps. Your family may need to stay elsewhere for part of the job. It is better to know early.
Set Up Work Zones and Clear Access Routes
Once you know the work zone, prepare the path to it. This step is simple, but it makes a big difference.
Choose the Main Entry Point
Pick one entry for the crew. A side door or garage entry works well. This keeps traffic away from your main living space. It also limits dirt in the rest of the house.
Clear the Path
Remove anything the crew could trip over or bump into. This includes:
- Shoes and bags near the entry
- Area rugs on the route
- Wall hangings along narrow hallways
- Small furniture on the path
- Plants and decor near doorways
Measure doorways and tight turns if the project involves large items, such as cabinets, a vanity, or a tub. Your contractor will want to know if a piece will not fit.
Plan Parking and Driveway Space
Crews arrive in trucks and trailers. Make room in the driveway or on the street. In Indiana winters, clear snow and ice from the driveway and walkways before work starts. A slick path is a safety risk for you and the crew.
Mark Off-Limits Areas
Decide which rooms the crew should not enter. Tell them directly. A simple sign on the door helps. Close and, if you wish, lock those doors on work days.
Control Dust Before It Spreads
Dust is the top complaint during remodeling. You cannot remove it fully, but you can control most of it. Do this before demolition starts.
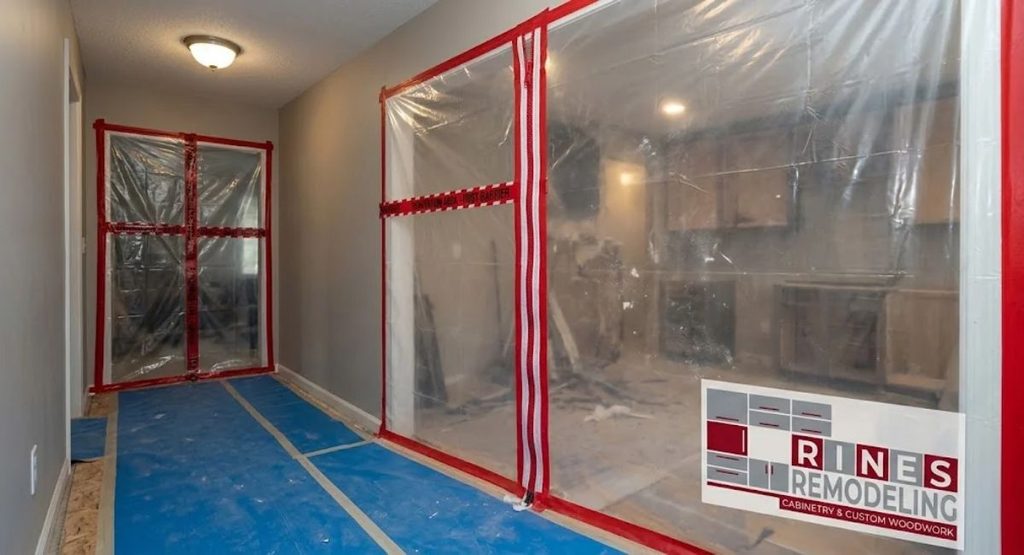
Seal the Work Area With Dust Barriers
Plastic sheeting taped to the ceiling, floor, and walls blocks airborne dust. Many crews use zip-style barrier systems. These have a built-in zipper door so workers can pass through without opening the whole barrier.
Good barriers share a few traits:
- They reach from floor to ceiling
- The edges are sealed with tape rated for the surface
- They include a door or flap for access
- They are checked each day for gaps
Ask your contractor how they will seal the area. If they do not mention it, ask directly.
Close Off Vents and Return Air
Your heating and cooling system moves air through the whole house. If it pulls dust from the work zone, it spreads that dust everywhere.
Take these steps:
- Cover the supply vents in the work area with plastic and tape
- Cover or seal the return air vent in the work area
- Keep the system fan off during dusty phases if your contractor advises it
- Close doors to rooms that will not be used
Upgrade and Replace HVAC Filters
A clean filter helps trap fine dust. Before work begins, replace your furnace filter. Check it every one to two weeks during the project. Dust loads can clog filters faster than normal use.
Choose a filter with a higher efficiency rating if your system allows it. Check the system manual first. A filter that is too dense can restrict airflow and strain the equipment. If you are unsure, ask your HVAC technician.
Use Air Filtration and Negative Air If Possible
Some contractors use a negative air machine. This device pulls air out of the work zone through a filter and vents it outside. It keeps the zone at lower pressure, so dust tends to stay inside.
If your crew does not use one, a portable HEPA air purifier in nearby rooms can help. Place it outside the barrier, not inside.
Dust Control Summary
| Step | Purpose | Who Usually Handles It |
| Plastic or zip barriers | Block airborne dust at doorways | Contractor |
| Vent and return covers | Keep dust out of ductwork | Contractor or homeowner |
| New HVAC filter | Trap fine particles | Homeowner |
| HEPA air purifier | Clean air in nearby rooms | Homeowner |
| Daily cleanup | Remove settled dust | Contractor |
Protect Floors, Walls, and Furniture
Even with good dust control, heavy work can mark floors and walls. Protection is cheap compared to repair.
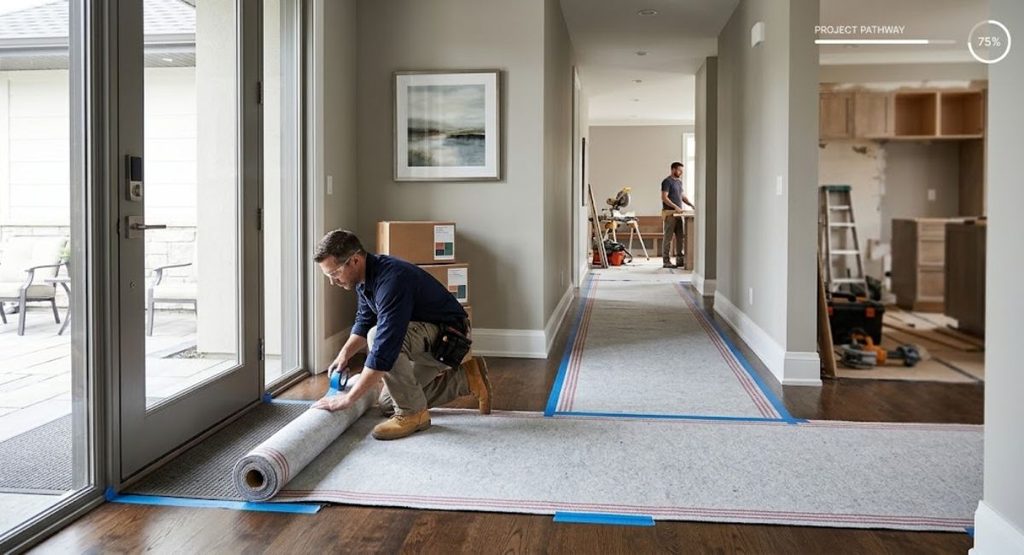
Protect Floors Along the Path
Cover the floors from the entry door to the work zone. Common choices include:
- Rosin paper or builder’s paper for light protection
- Heavy-duty floor protection sheets for high traffic
- Hardboard or similar rigid board for heavy loads
- Adhesive film for finished hardwood or tile
Hardwood floors need special care. Use materials made for them. Avoid sticking regular tape directly to a finished floor. Ask your contractor which products they use.
Protect Corners and Doorframes
Corner guards and padding protect walls at turns. Wrap doorframes where large items will pass. These small steps prevent common dings.
Move Furniture Out of the Work Zone
Move all furniture out of the room being remodeled. Do this a day or two before the start date. If a piece is too large to move, cover it with plastic and pad it well. Keep in mind that plastic over furniture traps dust on top but can also trap moisture. Use breathable drop cloths for long projects.
Plan Temporary Furniture Storage
Think about where your furniture will live. Options include:
- A spare room
- The garage, if it is dry and clean
- A rented storage unit
- A portable storage container
For Indiana winters, avoid storing wood furniture, electronics, or upholstered pieces in an unheated, damp space. Cold swings and humidity can damage them. Keep items off the floor and covered.
Protect Valuables and Personal Items
Remove valuables from the work area and nearby rooms. This includes:
- Jewelry and cash
- Important documents
- Electronics and chargers
- Art and framed photos
- Family keepsakes
- Medications
Store them in a locked closet or take them off site. This is not about distrust. It protects against accidents, and it keeps you from searching for items later.
Your Room-by-Room Remodeling Preparation Checklist
Use this checklist to guide your work. Adjust it to match your project. Print it, check items off, and keep it handy.
Kitchen
A kitchen project is one of the most disruptive. You lose your sink, stove, and counters at once.
- Empty all cabinets and drawers
- Pack dishes, glassware, and small appliances
- Keep a small set of dishes, utensils, and cookware for temporary use
- Empty the refrigerator if it will be moved
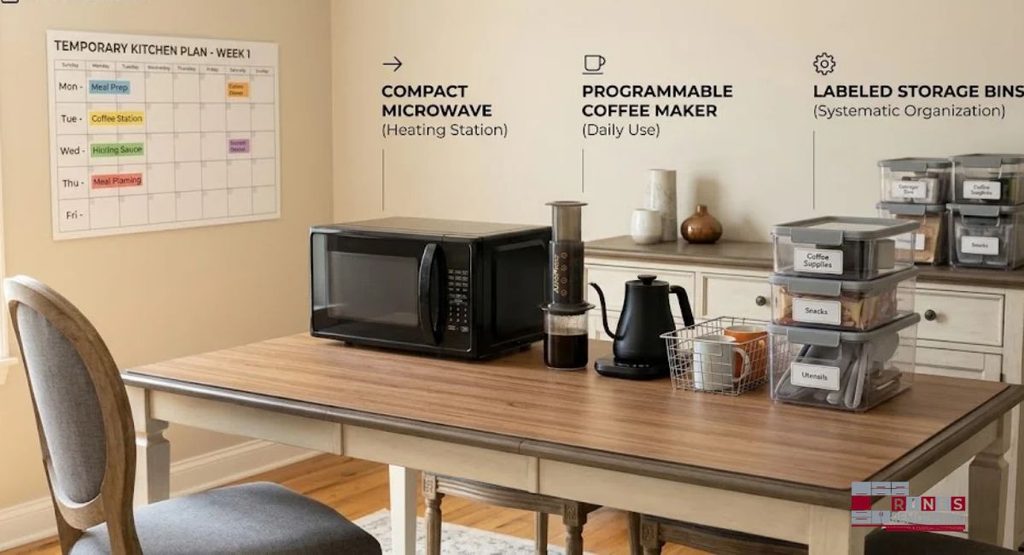
- Plan a temporary kitchen with a microwave, kettle, and cooler
- Clear countertops completely
- Remove items from the tops of cabinets
- Take down wall decor and window treatments
- Cover or move the table and chairs
- Turn off the dishwasher and cover vents
If you are planning a kitchen project, a clear plan matters even more. See how the process works on the Custom kitchen remodeling in Indiana page.
Bathroom
A bathroom is often the only one for the household. Plan for this.
- Remove towels, toiletries, and cleaning supplies
- Empty the vanity, linen closet, and medicine cabinet
- Take down mirrors, shelves, and accessories
- Remove rugs and mats
- Set up a temporary bathroom elsewhere if the project is long
- Plan where to shower if no other bath is available
- Keep a basic supply kit in another room
For more on what to expect, visit the bathroom remodeling page.
Basement
Basement work often involves moisture, framing, and utilities.
- Clear the full space of storage
- Move boxes off the floor and away from walls
- Check for signs of moisture or leaks and tell your contractor
- Protect or relocate the water heater, furnace, and washer and dryer access
- Keep clear access to the main electrical panel and shutoff valves
- Wrap items that cannot be moved
Basements in central Indiana can be damp, especially in spring. Keep stored items in sealed plastic bins instead of cardboard.
Bedrooms and Living Areas Nearby
Rooms next to the work zone still collect dust and noise.
- Close doors and seal gaps with tape if needed
- Cover furniture with breathable sheets
- Move clothing into closed closets or dressers
- Take down fragile items from shelves
- Unplug electronics
Entry, Hallways, and Garage
These areas carry the traffic.
- Clear shoes, coats, and bags
- Take down hallway art and mirrors
- Lay floor protection
- Make room in the garage for tools and materials if agreed
- Clear the driveway and walkway
Whole House
- Replace the furnace filter
- Test smoke and carbon monoxide detectors
- Take photos of each room as it looks today
- Note existing damage, such as scratches or cracks
- Confirm Wi-Fi and phone charging spots
Taking photos before work starts gives you a clear record. It also helps if you need to talk about a concern later.
Plan for Pets and Children
Pets and children are curious. A job site is not a safe place for either.
Keep Pets Safe and Calm
Noise, strangers, and open doors can stress pets. Open doors also create an escape risk.
Try these steps:
- Choose a quiet room away from the work for your pet
- Keep the door closed and add a sign for the crew
- Provide water, food, bedding, and toys
- Think about daycare, boarding, or a friend’s home on loud days
- Tell the crew about your pets
- Update the microchip and collar tags before the project starts
Cats may hide in unexpected places, such as inside open walls or under tarps. Check each time you open a closed space.
Keep Children Away From Hazards
Nails, tools, dust, and open walls are real dangers. Set clear rules.
- Explain that the work area is off limits
- Use gates or locks on doors if needed
- Keep play areas on the far side of the house
- Store tools and chemicals out of reach if left in view
- Plan activities away from the home on loud days
If your home was built before 1978, ask your contractor about lead-safe work practices. This is especially important for young children, since they are more sensitive to lead dust.
Consider Family Members With Health Needs
If someone in your household has asthma, allergies, or a respiratory condition, talk with your doctor. Dust and fumes can aggravate symptoms. You may want to plan for a stay elsewhere during the dustiest phases.
Adjust Your Daily Routine Before Work Begins
A remodel affects meals, sleep, laundry, and work. Plan ahead and the project feels much smoother.
Plan Meals
If your kitchen is out of service, a simple plan helps. Stock easy meals, such as sandwiches, salads, and slow cooker dishes. A microwave, an electric kettle, and a small grill can cover most needs. Budget for some takeout. Many families find that two or three weeks of simple meals are manageable with a little planning.
Plan Laundry
If the laundry area will be blocked, set aside a week of clean clothes. Plan to use a laundromat or a friend’s machine if needed.
Plan Your Workday
If you work from home, choose a quiet spot far from the work zone. Noise from saws and hammers carries. Headphones help, but they do not solve everything. You may need to shift calls to a library, coworking space, or office on loud days.
Plan for Sleep
Early starts can affect sleep, especially for night-shift workers or families with infants. Ask your contractor about typical start times. If needed, plan for quieter rooms or white noise.
Plan for Visitors and Deliveries
Let family and friends know about the project. Ask delivery drivers to leave packages at a safe spot. A busy job site is not the best place for a package to sit.
Know Your Utilities and Shutoffs
Your contractor will likely need to shut off water, power, or gas at points during the project. Prepare for this.
- Locate the main water shutoff valve
- Locate the electrical panel and label the breakers
- Know where the gas shutoff is
- Tell your contractor about any known issues, such as old wiring or slow drains
- Plan for outages and keep flashlights on hand
- Charge devices before planned outages
If the project includes plumbing or electrical changes, ask when shutoffs will happen and how long they will last.
A Simple Timeline for Preparing Your Home
The tasks above feel like a lot. A timeline spreads them out. Use this table as a guide.
| When | What to Do |
| 3 to 4 weeks before | Meet your contractor, confirm schedule, order materials, plan storage |
| 2 weeks before | Declutter, pack nonessential items, arrange pet and child plans |
| 1 week before | Pack the work zone, replace HVAC filters, clear access routes |
| 2 to 3 days before | Move furniture, lay floor protection, set up temporary kitchen or bath |
| Day before | Secure valuables, clear the driveway, take photos, confirm start time |
Common Preparation Mistakes to Avoid
Many homeowners run into the same problems. You can avoid them.
- Waiting until the last day. Packing takes longer than expected.
- Leaving valuables in reach. Move them before the crew arrives.
- Skipping dust barriers. Dust spreads quickly without them.
- Forgetting the HVAC system. Unsealed vents move dust through the house.
- Not planning meals. A kitchen project hits hardest around dinner time.
- Ignoring pets. Open doors and noise create stress and risk.
- Not asking questions. Your contractor expects them.
Frequently Asked Questions About Preparations Before Remodeling
How far in advance should I prepare for a remodel?
Start planning three to four weeks before the start date. Begin packing and decluttering two weeks ahead. Finish moving furniture and protecting floors in the last few days.
Do I need to move out during a remodel?
Not always. Many homeowners stay in place during kitchen or bathroom projects. Whole-home projects, major dust or lead concerns, or limited access to water and power may make a temporary move wise. Talk with your contractor about the scope.
What should I move out of the room before remodeling?
Remove everything you can. This includes furniture, decor, rugs, window treatments, and items in cabinets and closets. Anything left should be covered and padded.
How do I reduce dust during home renovation?
Seal the work area with plastic or zip barriers. Cover vents and returns in the work zone. Replace HVAC filters before work starts and check them often. Use a HEPA air purifier in nearby rooms. Ask your contractor to clean up daily.
Can I stay home while contractors work?
Yes, in most cases. Plan a quiet space, a temporary kitchen or bath if needed, and a plan for pets and children. Your contractor can explain what will be loud or dusty on each day.
Should I be home during the project?
It helps to be reachable. You do not need to be present every hour, but quick answers keep the project moving. Many homeowners are home on key days, such as the first day and the final walkthrough.
Build Your Plan, Then Let the Crew Work
Good preparation is not about perfection. It is about removing obstacles so the work can start on time and move forward. You protect your home, your belongings, and your family. You also give your contractor room to do quality work.
Start with a short list. Talk with your contractor. Seal off the work zone, protect your floors, and move the things you care about. Plan your meals, your pets, and your daily routine. Do a final walkthrough the day before.
If you are planning a project and want clear guidance from the first meeting, Rines Remodeling can walk you through preparation, scheduling, and what to expect. Whether you are updating a kitchen, a bathroom, a basement, or the whole house, the team can match the plan to your home. To see the full range of work, visit the residential remodeling page, then reach out to schedule a consultation.
Printable Room-by-Room Checklist
Before the Start Date
- Confirm start date, work hours, and work zone with your contractor
- Confirm the entry door and parking spot for the crew
- Review permit and neighborhood rules
- Ask about lead-safe practices if your home was built before 1978
- Locate the water shutoff, electrical panel, and gas shutoff
- Replace the furnace filter
- Take photos of every room
Work Zone
- Empty cabinets, closets, and drawers
- Remove furniture, rugs, and decor
- Take down wall hangings and window treatments
- Set up a temporary kitchen or bathroom if needed
Access Routes
- Clear the path from entry to work zone
- Lay floor protection
- Add corner guards where needed
- Clear snow and ice from walkways and driveway
Dust Control
- Confirm barrier plan with your contractor
- Cover vents and returns in the work area
- Close doors to nearby rooms
- Place a HEPA air purifier outside the barrier
Valuables and Safety
- Secure jewelry, cash, and documents
- Store electronics and keepsakes
- Remove medications from the work area
- Test smoke and carbon monoxide detectors
People and Pets
- Set up a quiet room for pets
- Update pet tags and microchip details
- Set rules for children
- Plan for health needs
Daily Life
- Stock easy meals
- Plan laundry
- Choose a quiet workspace
- Share the schedule with family and friends.